Difference between revisions of "Tyranids(Fourth Edition) - Collectors Guide"
(→Biovore) |
(→Hive Tyrant & Tyrant Guard) |
||
| Line 3: | Line 3: | ||
<gallery> | <gallery> | ||
Image:Hive Tyrant.jpg|Hive Tyrant | Image:Hive Tyrant.jpg|Hive Tyrant | ||
| − | Image:Tyrant Guard 1.jpg|Tyrant Guard 1 | + | Image:Tyrant Guard Body 1.jpg|Tyrant Guard Body 1 |
| − | Image:Tyrant Guard 2.jpg|Tyrant Guard 2 | + | Image:Tyrant Guard Body 2.jpg|Tyrant Guard Body 2 |
| + | Image:Tyrant Guard left leg 1.jpg|Tyrant Guard left leg 1 | ||
| + | Image:Tyrant Guard left leg 2.jpg|Tyrant Guard left leg 2 | ||
| + | Image:Tyrant Guard right leg 1.jpg|Tyrant Guard right leg 1 | ||
| + | Image:Tyrant Guard right leg 2.jpg|Tyrant Guard right leg 2 | ||
| + | Image:Tyrant Guard left arm with shield 1.jpg|Tyrant Guard left arm with shield 1 | ||
| + | Image:Tyrant Guard left arm with shield 2.jpg|Tyrant Guard left arm with shield 2 | ||
| + | Image:Tyrant Guard right arm 1.jpg|Tyrant Guard right arm 1 | ||
| + | Image:Tyrant Guard right arm 2.jpg|Tyrant Guard right arm 2 | ||
| + | Image:Tyrant Guard right arm with lash whip 1.jpg|Tyrant Guard right arm with lash whip 1 | ||
| + | Image:Tyrant Guard right arm with lash whip 2.jpg|Tyrant Guard right arm with lash whip 2 | ||
| + | |||
</gallery> | </gallery> | ||
Revision as of 20:14, 18 October 2008
Contents
Hive Tyrant & Tyrant Guard

Hive Tyrant

Tyrant Guard Body 1

Tyrant Guard Body 2

Tyrant Guard left leg 1

Tyrant Guard left leg 2

Tyrant Guard right leg 1

Tyrant Guard right leg 2

Tyrant Guard left arm with shield 1

Tyrant Guard left arm with shield 2

Tyrant Guard right arm 1

Tyrant Guard right arm 2
Tyrant Guard right arm with lash whip 1
Tyrant Guard right arm with lash whip 2


Gargoyles
Fourth Edition Gargoyle 1
Fourth Edition Gargoyle 2
Fourth Edition Gargoyle 3
Fourth Edition Gargoyle 4
Biovore

Fourth Edition Biovore
Fourth Edition Acid Spore Mine 1
Fourth Edition Acid Spore Mine 2
Fourth Edition Acid Spore Mine 3
Fourth Edition Frag Spore Mine 1
Fourth Edition Frag Spore Mine 2
Fourth Edition Frag Spore Mine 3
Fourth Edition Poison Spore Mine 1
Fourth Edition Poison Spore Mine 2
Fourth Edition Poison Spore Mine 3

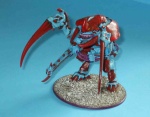
Ravenor

Ravenor

Ravenor head 1
Ravenor head 2
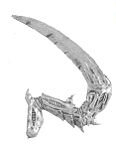
Ravenor right scythe arm 1
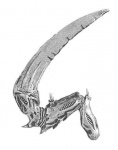
Ravenor right scythe arm 2
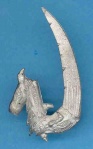
Ravenor left scythe arm 1
Ravenor left scythe arm 2


Zoanthrope

Fourth Edition Zoanthrope
Fourth Edition Zoanthrope carapace 1
Fourth Edition Zoanthrope carapace 2

Lictor, Carnifex, Old One Eye, Red Terror

Fourth Edition Lictor
Fourth Edition Carnifex
Old One Eye

Red Terror


