Difference between revisions of "Tyranids (Second Edition) - Collectors Guide"
m (Text replace - "Image:" to "file:") |
|||
| Line 2: | Line 2: | ||
<gallery> | <gallery> | ||
| − | + | file:Termagant with fleshborer 1.jpg|Termagant with fleshborer 1 | |
| − | + | file:Termagant with fleshborer 2.jpg|Termagant with fleshborer 2 | |
| − | + | file:Termagant with fleshborer 3.jpg|Termagant with fleshborer 3 | |
| − | + | file:Termagant with fleshborer 4.jpg|Termagant with fleshborer 4 | |
| − | + | file:Termagant with spike rifle 1.jpg|Termagant with spike rifle 1 | |
| − | + | file:Termagant with spike rifle 2.jpg|Termagant with spike rifle 2 | |
| − | + | file:Termagant with spike rifle 3.jpg|Termagant with spike rifle 3 | |
| − | + | file:Termagant with spike rifle 4.jpg|Termagant with spike rifle 4 | |
| − | + | file:Termagant with strangleweb 1.jpg|Termagant with strangleweb 1 | |
| − | + | file:Termagant with strangleweb 2.jpg|Termagant with strangleweb 2 | |
| − | + | file:Termagant with strangleweb 3.jpg|Termagant with strangleweb 3 | |
| − | + | file:Termagant with strangleweb 4.jpg|Termagant with strangleweb 4 | |
</gallery> | </gallery> | ||
| Line 19: | Line 19: | ||
<gallery> | <gallery> | ||
| − | + | file:Gargoyle Body 1.jpg|Gargoyle Body 1 | |
| − | + | file:Gargoyle Body 2.jpg|Gargoyle Body 2 | |
| − | + | file:Gargoyle Body 3.jpg|Gargoyle Body 3 | |
| − | + | file:Gargoyle Body 4.jpg|Gargoyle Body 4 | |
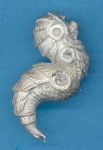
| − | + | file:Gargoyle Tail 1.jpg|Gargoyle Tail 1 | |
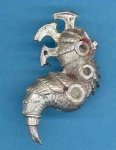
| − | + | file:Gargoyle Tail 2.jpg|Gargoyle Tail 2 | |
| − | + | file:Gargoyle Tail 3.jpg|Gargoyle Tail 3 | |
| − | + | file:Gargoyle Tail 4.jpg|Gargoyle Tail 4 | |
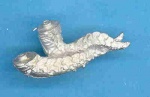
| − | + | file:Gargoyle Wings.jpg|Gargoyle Wings | |
</gallery> | </gallery> | ||
| Line 33: | Line 33: | ||
<gallery> | <gallery> | ||
| − | + | file:Hormagant Body 1.jpg|Hormagant Body 1 | |
| − | + | file:Hormagant Body 2.jpg|Hormagant Body 2 | |
| − | + | file:Hormagant Body 3.jpg|Hormagant Body 3 | |
| − | + | file:Hormagant Rear Claws.jpg|Hormagant Rear Claws | |
| − | + | file:Hormagant Right Fore Arm.jpg|Hormagant Right Fore Arm | |
| − | + | file:Hormagant Left Fore Arm.jpg|Hormagant Left Fore Arm | |
</gallery> | </gallery> | ||
| Line 45: | Line 45: | ||
<gallery> | <gallery> | ||
| − | + | file:Ripper Head 1.jpg|Ripper Head 1 | |
| − | + | file:Ripper Head 2.jpg|Ripper Head 2 | |
| − | + | file:Ripper Body 1.jpg|Ripper Body 1 | |
| − | + | file:Ripper Body 2.jpg|Ripper Body 2 | |
| − | + | file:Ripper Twin Body.jpg|Ripper Twin Body | |
</gallery> | </gallery> | ||
| Line 55: | Line 55: | ||
<gallery> | <gallery> | ||
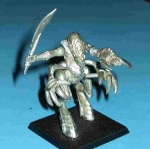
| − | + | file:Warrior with venom cannon.jpg|Warrior with venom cannon | |
| − | + | file:Warrior with barbed strangler.jpg|Warrior with barbed strangler | |
| − | + | file:Warrior with devourer.jpg|Warrior with devourer | |
| − | + | file:Warrior with spinefist & bonesword.jpg|Warrior with spinefist & bonesword | |
| − | + | file:Warrior with lashwhip & bonesword.jpg|Warrior with lashwhip & bonesword | |
| − | + | file:Warrior with boneswords plastic.jpg|Warrior with boneswords (plastic) | |
| − | + | file:Warrior with deathspitter plastic.jpg|Warrior with deathspitter (plastic) | |
</gallery> | </gallery> | ||
<gallery> | <gallery> | ||
| − | + | file:Warrior body 1.jpg|Warrior body 1 | |
| − | + | file:Warrior body 2.jpg|Warrior body 2 | |
| − | + | file:Warrior head 1.jpg|Warrior head 1 | |
| − | + | file:Warrior head 2.jpg|Warrior head 2 | |
| − | + | file:Warrior left leg.jpg|Warrior left leg | |
| − | + | file:Warrior right leg.jpg|Warrior right leg | |
| − | + | file:Warrior left claw.jpg|Warrior left claw | |
| − | + | file:Warrior right claw.jpg|Warrior right claw | |
| − | + | file:Warrior venom cannon arm.jpg|Warrior venom cannon arm | |
| − | + | file:Warrior barbed strangler arm.jpg|Warrior barbed strangler arm | |
| − | + | file:Warrior devourer arm.jpg|Warrior devourer arm | |
| − | + | file:Warrior cannon arm.jpg|Warrior cannon arm | |
| − | + | file:Warrior spinefist arm.jpg|Warrior spinefist arm | |
| − | + | file:Warrior whip arm.jpg|Warrior whip arm | |
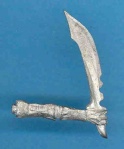
| − | + | file:Warrior lash whip.jpg|Warrior lash whip (also used for the Hive Tyrant) | |
| − | + | file:Warrior right arm with bonesword 1.jpg|Warrior right arm with bonesword 1 | |
| − | + | file:Warrior right arm with bonesword 2.jpg|Warrior right arm with bonesword 2 | |
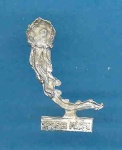
| − | + | file:Warrior left arm with bonesword 1.jpg|Warrior left arm with bonesword | |
</gallery> | </gallery> | ||
| Line 88: | Line 88: | ||
<gallery> | <gallery> | ||
| − | + | file:Hive Tyrant.jpg|Hive Tyrant | |
| − | + | file:Biovore.jpg|Biovore | |
| − | + | file:Spore Mine 1.jpg|Spore Mine 1 | |
| − | + | file:Spore Mine 2.jpg|Spore Mine 2 | |
| − | + | file:Zoanthrope.jpg|Zoanthrope | |
| − | + | file:Lictor.jpg|Lictor | |
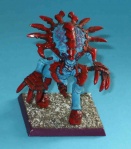
| − | + | file:Carnifex.jpg|Carnifex | |
</gallery> | </gallery> | ||
[[Category:Genestealers]] | [[Category:Genestealers]] | ||
[[Category:Tyranids]] | [[Category:Tyranids]] | ||
Revision as of 04:03, 1 June 2011
Contents
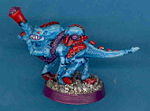
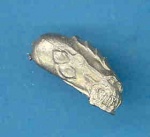
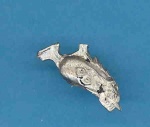
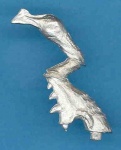
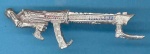
Termagants
Termagant with fleshborer 1
Termagant with fleshborer 2

Termagant with fleshborer 3

Termagant with fleshborer 4
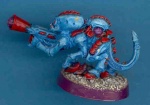
Termagant with spike rifle 1

Termagant with spike rifle 2
Termagant with spike rifle 3

Termagant with spike rifle 4
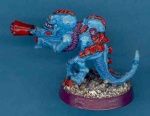
Termagant with strangleweb 1
Termagant with strangleweb 2

Termagant with strangleweb 3
Termagant with strangleweb 4


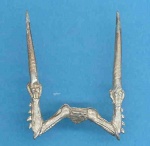
Gargoyles

Gargoyle Body 1

Gargoyle Body 2

Gargoyle Body 3

Gargoyle Body 4

Gargoyle Tail 1

Gargoyle Tail 2

Gargoyle Tail 3
Gargoyle Tail 4

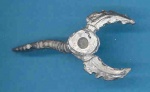
Gargoyle Wings


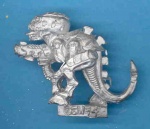
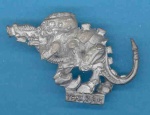
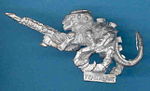
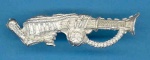
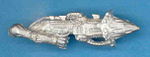
Hormagants
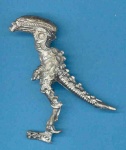
Hormagant Body 1
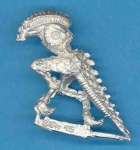
Hormagant Body 2

Hormagant Body 3
Hormagant Rear Claws

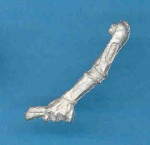
Hormagant Right Fore Arm

Hormagant Left Fore Arm


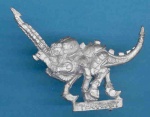
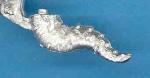
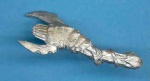
Ripper Swarms

Ripper Head 1

Ripper Head 2

Ripper Body 1
Ripper Body 2
Ripper Twin Body


Warriors

Warrior with venom cannon

Warrior with barbed strangler

Warrior with devourer
Warrior with spinefist & bonesword

Warrior with lashwhip & bonesword

Warrior with boneswords (plastic)

Warrior with deathspitter (plastic)


Warrior body 1
Warrior body 2
Warrior head 1
Warrior head 2

Warrior left leg
Warrior right leg

Warrior left claw

Warrior right claw
Warrior venom cannon arm
Warrior barbed strangler arm
Warrior devourer arm
Warrior cannon arm
Warrior spinefist arm

Warrior whip arm

Warrior lash whip (also used for the Hive Tyrant)
Warrior right arm with bonesword 1

Warrior right arm with bonesword 2

Warrior left arm with bonesword


Hive Tyrant, Biovore, Zoanthrope, Lictor, Carnifex

Hive Tyrant

Biovore

Spore Mine 1
Spore Mine 2
Zoanthrope

Lictor

Carnifex


