Difference between revisions of "Necromunda 1999 onwards - Collectors Guide"
m (Text replace - "image:" to "file:") |
m (Text replace - "Image:" to "file:") |
||
| Line 39: | Line 39: | ||
<gallery> | <gallery> | ||
| − | + | file:Necromunda Orlock Champion 1 body.jpg|Champion 1 body (Included in boxed set) | |
| − | + | file:Necromunda Orlock Champion 2 body.jpg|Champion 2 body | |
| − | + | file:Necromunda Orlock Heavy 1 body.jpg|Heavy 1 body (Included in boxed set) | |
| − | + | file:Necromunda Orlock Heavy 2 body.jpg|Heavy 2 body | |
| − | + | file:Necromunda Orlock Heavy Stubber.jpg|Heavy Stubber (Included in boxed set) | |
| − | + | file:Necromunda Orlock Heavy Bolter.jpg|Heavy Bolter | |
| − | + | file:Necromunda Orlock Heavy Missile Launcher.jpg|Heavy Missile Launcher | |
| − | + | file:Necromunda Orlock Missile.jpg|Missile | |
| − | + | file:Necromunda Orlock Heavy Backpack.jpg|Heavy Backpack (Included in boxed set) | |
| − | + | file:Necromunda Orlock Ganger 1.jpg|Ganger 1 (Included in boxed set) | |
| − | + | file:Necromunda Orlock Ganger 2.jpg|Ganger 2 (Included in boxed set) | |
| − | + | file:Necromunda Orlock Ganger 3.jpg|Ganger 3 (Included in boxed set) | |
| − | + | file:Necromunda Orlock Ganger 4.jpg|Ganger 4 (Included in boxed set) | |
| − | + | file:Necromunda Orlock Juve 1.jpg|Juve 1 (Included in boxed set) | |
| − | + | file:Necromunda Orlock Juve 2.jpg|Juve 2 (Included in boxed set) | |
| − | + | file:Necromunda Orlock Juve 3.jpg|Juve 3 | |
| − | + | file:Necromunda Orlock Juve 4.jpg|Juve 4 | |
| − | + | file:Necromunda Orlock Weapon Sprue 1.jpg|Weapon Sprue 1 (Included in boxed set) | |
| − | + | file:Necromunda Orlock Weapon Sprue 2.jpg|Weapon Sprue 2 (Included in boxed set) | |
| − | + | file:Necromunda Orlock Weapon Sprue 3.jpg|Weapon Sprue 3 (Included in boxed set) | |
| − | + | file:Necromunda Orlock Weapon Sprue 4.jpg|Weapon Sprue 4 (Included in boxed set) | |
| − | + | file:Necromunda Orlock Weapon Sprue 5.jpg|Weapon Sprue 5 (Included in boxed set) | |
</gallery> | </gallery> | ||
| Line 66: | Line 66: | ||
<gallery> | <gallery> | ||
| − | + | file:Necromunda Goliath Champion 1 body.jpg|Champion 1 body (Included in boxed set) | |
| − | + | file:Necromunda Goliath Champion 2 body.jpg|Champion 2 body | |
| − | + | file:Necromunda Goliath Heavy 1 body.jpg|Heavy 1 body | |
| − | + | file:Necromunda Goliath Heavy 2 body.jpg|Heavy 2 body (Included in boxed set) | |
| − | + | file:Necromunda Goliath Heavy Weapon Sprue.jpg|Heavy Weapon Sprue (Included in boxed set) | |
| − | + | file:Necromunda Goliath Heavy Backpack.jpg|Heavy Backpack (Included in boxed set) | |
| − | + | file:Necromunda Goliath Ganger 1.jpg|Goliath Ganger 1 (Included in boxed set) | |
| − | + | file:Necromunda Goliath Ganger 2.jpg|Goliath Ganger 2 (Included in boxed set) | |
| − | + | file:Necromunda Goliath Ganger 3.jpg|Goliath Ganger 3 (Included in boxed set) | |
| − | + | file:Necromunda Goliath Ganger 4.jpg|Goliath Ganger 4 (Included in boxed set) | |
| − | + | file:Necromunda Goliath Ganger 5.jpg|Goliath Ganger 5 | |
| − | + | file:Necromunda Goliath Juve 1.jpg|Goliath Juve 1 | |
| − | + | file:Necromunda Goliath Juve 2.jpg|Goliath Juve 2 (Included in boxed set) | |
| − | + | file:Necromunda Goliath Juve 3.jpg|Goliath Juve 3 (Included in boxed set) | |
| − | + | file:Necromunda Goliath Juve 4.jpg|Goliath Juve 4 | |
| − | + | file:Necromunda Goliath Juve 5.jpg|Goliath Juve 5 | |
| − | + | file:Necromunda Goliath Weapon Sprue 1.jpg|Weapon Sprue 1 (Included in boxed set) | |
| − | + | file:Necromunda Goliath Weapon Sprue 2.jpg|Weapon Sprue 2 (Included in boxed set) | |
| − | + | file:Necromunda Goliath Weapon Sprue 3.jpg|Weapon Sprue 3 (Included in boxed set) | |
| − | + | file:Necromunda Goliath Weapon Sprue 4.jpg|Weapon Sprue 4 (Included in boxed set) | |
</gallery> | </gallery> | ||
| Line 91: | Line 91: | ||
<gallery> | <gallery> | ||
| − | + | file:Necromunda Ash Waste Leader with goggles.jpg|Leader with goggles | |
| − | + | file:Necromunda Ash Waste Leader with hood.jpg|Leader with hood | |
| − | + | file:Necromunda Ash Waste Heavy with hood down.jpg|Heavy with hood down | |
| − | + | file:Necromunda Ash Waste Heavy with hood up.jpg|Heavy with hood up | |
| − | + | file:Necromunda Ash Waste Ganger with sniper rifle.jpg|Ganger with sniper rifle | |
| − | + | file:Necromunda Ash Waste Ganger with autogun.jpg|Ganger with autogun | |
| − | + | file:Necromunda Ash Waste Ganger with cap.jpg|Ganger with cap | |
| − | + | file:Necromunda Ash Waste Ganger with hood.jpg|Ganger with hood | |
| − | + | file:Necromunda Ash Waste Juve with hood up.jpg|Juve with hood up | |
| − | + | file:Necromunda Ash Waste Juve with hood down.jpg|Juve with hood down | |
| − | + | file:Necromunda Ash Waste Juve with scarf.jpg|Juve with scarf | |
| − | + | file:Necromunda Ash Waste Hand Weapon Sprue.jpg|Hand Weapon Sprue | |
| − | + | file:Necromunda Ash Waste Rifle Sprue.jpg|Rifle Sprue | |
| − | + | file:Necromunda Ash Waste Stubber.jpg|Stubber | |
| − | + | file:Necromunda Ash Waste Heavy Bolter.jpg|Heavy Bolter | |
| − | + | file:Necromunda Ash Waste Sniper Rifle.jpg|Sniper Rifle | |
</gallery> | </gallery> | ||
| Line 112: | Line 112: | ||
<gallery> | <gallery> | ||
| − | + | file:Necromunda Scavvy Leader 1.jpg|Leader 1 (Included in boxed set) | |
| − | + | file:Necromunda Scavvy Leader 2.jpg|Leader 2 | |
| − | + | file:Necromunda Scavvy Scaly Body 1.jpg|Scaly Body 1 (Included in boxed set) | |
| − | + | file:Necromunda Scavvy Scaly Body 2.jpg|Scaly Body 2 | |
| − | + | file:Necromunda Scavvy Scaly Harpoon Gun 1.jpg|Harpoon Gun 1 | |
| − | + | file:Necromunda Scavvy Scaly Harpoon Gun 2.jpg|Harpoon Gun 2 (Included in boxed set) | |
| − | + | file:Necromunda Scavvy Scaly Sprue.jpg|Scaly Sprue | |
| − | + | file:Necromunda Scavvy Ganger 1.jpg|Ganger 1 (Included in boxed set) | |
| − | + | file:Necromunda Scavvy Ganger 2.jpg|Ganger 2 (Included in boxed set) | |
| − | + | file:Necromunda Scavvy Ganger 3.jpg|Ganger 3 (Included in boxed set) | |
| − | + | file:Necromunda Scavvy Ganger 4.jpg|Ganger 4 (Included in boxed set) | |
| − | + | file:Necromunda Scavvy Ganger 5.jpg|Ganger 5 (Included in boxed set) | |
| − | + | file:Necromunda Scavvy Ganger 6.jpg|Ganger 6 (Included in boxed set) | |
| − | + | file:Necromunda Scavvy Weapon Sprue 1.jpg|Weapon Sprue 1 (Included in boxed set) | |
| − | + | file:Necromunda Scavvy Weapon Sprue 2.jpg|Weapon Sprue 2 (Included in boxed set) | |
| − | + | file:Necromunda Scavvy Weapon Sprue 3.jpg|Weapon Sprue 3 (Included in boxed set) | |
| − | + | file:Necromunda Scavvy Weapon Sprue 4.jpg|Weapon Sprue 4 (Included in boxed set) | |
| − | + | file:Necromunda Scavvy Ghoul 1.jpg|Ghoul 1 | |
| − | + | file:Necromunda Scavvy Ghoul 2.jpg|Ghoul 2 | |
| − | + | file:Necromunda Scavvy Ghoul 3.jpg|Ghoul 3 | |
| − | + | file:Necromunda Scavvy Ghoul 4.jpg|Ghoul 4 | |
| − | + | file:Necromunda Scavvy Dog.jpg|Dog | |
| − | + | file:Necromunda Scavvy Dog Head Sprue 1.jpg|Dog Head Sprue 1 | |
| − | + | file:Necromunda Scavvy Dog Head Sprue 2.jpg|Dog Head Sprue 2 | |
| − | + | file:Necromunda Scavvy Dog Head Sprue 3.jpg|Dog Head Sprue 3 | |
</gallery> | </gallery> | ||
| Line 142: | Line 142: | ||
<gallery> | <gallery> | ||
| − | + | file:Necromunda Ratskin Chief 1.jpg|Chief 1 | |
| − | + | file:Necromunda Ratskin Chief 2.jpg|Chief 2 | |
| − | + | file:Necromunda Ratskin Chief 3.jpg|Chief 3 | |
| − | + | file:Necromunda Ratskin Warrior 1.jpg|Warrior 1 (included in booster pack) | |
| − | + | file:Necromunda Ratskin Warrior 2.jpg|Warrior 2 (included in booster pack) | |
| − | + | file:Necromunda Ratskin Warrior 3.jpg|Warrior 3 | |
| − | + | file:Necromunda Ratskin Warrior 4.jpg|Warrior 4 | |
| − | + | file:Necromunda Ratskin Warrior 5.jpg|Warrior 5 | |
| − | + | file:Necromunda Ratskin Warrior 6.jpg|Warrior 6 | |
| − | + | file:Necromunda Ratskin Brave 1.jpg|Brave 1 (included in booster pack) | |
| − | + | file:Necromunda Ratskin Brave 2.jpg|Brave 2 | |
| − | + | file:Necromunda Ratskin Brave 3.jpg|Brave 3 | |
| − | + | file:Necromunda Ratskin Weapon Sprue 1.jpg|Weapon Sprue 1 | |
| − | + | file:Necromunda Ratskin Weapon Sprue 2.jpg|Weapon Sprue 2 (included in booster pack) | |
| − | + | file:Necromunda Ratskin Weapon Sprue 3.jpg|Weapon Sprue 3 (included in booster pack) | |
| − | + | file:Necromunda Ratskin Weapon Sprue 4.jpg|Weapon Sprue 4 (included in booster pack) | |
| − | + | file:Necromunda Ratskin Weapon Sprue 5.jpg|Weapon Sprue 5 | |
| − | + | file:Necromunda Ratskin Weapon Sprue 6.jpg|Weapon Sprue 6 | |
</gallery> | </gallery> | ||
| Line 165: | Line 165: | ||
<gallery> | <gallery> | ||
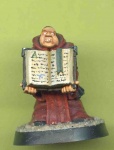
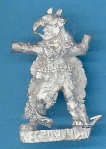
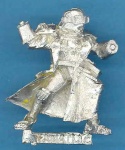
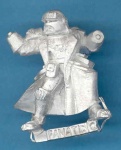
| − | + | file:Necromunda Redemptionist Leader Priest 1.jpg|Leader Priest 1 (Included in boxed set) | |
| − | + | file:Necromunda Redemptionist Leader Priest 2.jpg|Leader Priest 2 (Included in boxed set) | |
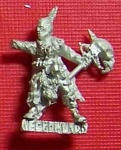
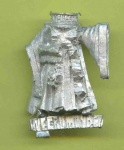
| − | + | file:Necromunda Redemptionist Brother 1.jpg|Brother 1 (Included in boxed set) | |
| − | + | file:Necromunda Redemptionist Brother 2.jpg|Brother 2 (Included in boxed set) | |
| − | + | file:Necromunda Redemptionist Brother 3.jpg|Brother 3 (Included in boxed set) | |
| − | + | file:Necromunda Redemptionist Brother 4.jpg|Brother 4 (Included in boxed set) | |
| − | + | file:Necromunda Redemptionist Juve 1.jpg|Juve 1 (Included in boxed set) | |
| − | + | file:Necromunda Redemptionist Juve 2.jpg|Juve 2 (Included in boxed set) | |
| − | + | file:Necromunda Redemptionist Head Sprue 1.jpg|Head Sprue 1 (Included in boxed set) | |
| − | + | file:Necromunda Redemptionist Head Sprue 2.jpg|Head Sprue 2 (Included in boxed set) | |
| − | + | file:Necromunda Redemptionist Head Sprue 3.jpg|Head Sprue 3 (Included in boxed set) | |
| − | + | file:Necromunda Redemptionist Head Sprue 4.jpg|Head Sprue 4 (Included in boxed set) | |
| − | + | file:Necromunda Redemptionist Head Sprue 5.jpg|Head Sprue 5 (Included in boxed set) | |
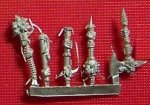
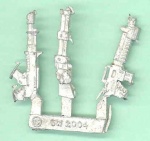
| − | + | file:Necromunda Redemptionist Weapon Sprue 1.jpg|Weapon Sprue 1 (Included in boxed set) | |
| − | + | file:Necromunda Redemptionist Weapon Sprue 2.jpg|Weapon Sprue 2 (Included in boxed set) | |
| − | + | file:Necromunda Redemptionist Weapon Sprue 3.jpg|Weapon Sprue 3 (Included in boxed set) | |
</gallery> | </gallery> | ||
| Line 186: | Line 186: | ||
<gallery> | <gallery> | ||
| − | + | file:Necromunda Van Saar Body 1.jpg|Body 1 | |
| − | + | file:Necromunda Van Saar Body 2.jpg|Body 2 | |
| − | + | file:Necromunda Van Saar Body 3.jpg|Body 3 | |
| − | + | file:Necromunda Van Saar Body 4.jpg|Body 4 | |
| − | + | file:Necromunda Van Saar Head Sprue 1.jpg|Head Sprue 1 | |
| − | + | file:Necromunda Van Saar Head Sprue 2.jpg|Head Sprue 2 | |
| − | + | file:Necromunda Van Saar Weapon Sprue 1.jpg|Weapon Sprue 1 | |
| − | + | file:Necromunda Van Saar Weapon Sprue 2.jpg|Weapon Sprue 2 | |
| − | + | file:Necromunda Van Saar Weapon Sprue 3.jpg|Weapon Sprue 3 | |
</gallery> | </gallery> | ||
| Line 200: | Line 200: | ||
<gallery> | <gallery> | ||
| − | + | file:Necromunda Enforcer Champion 1.jpg|Champion 1 | |
| − | + | file:Necromunda Enforcer Champion 2.jpg|Champion 2 (Included in boxed set) | |
| − | + | file:Necromunda Enforcer Champion 3.jpg|Champion 3 | |
| − | + | file:Necromunda Enforcer Heavy 1.jpg|Heavy 1 (Included in boxed set) | |
| − | + | file:Necromunda Enforcer Heavy 2.jpg|Heavy 2 | |
| − | + | file:Necromunda Enforcer Heavy Weapon.jpg|Heavy Weapon (Included in boxed set) | |
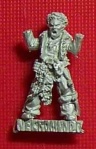
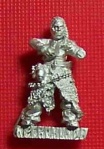
| − | + | file:Necromunda Enforcer 1.jpg|Enforcer 1 (Included in boxed set) | |
| − | + | file:Necromunda Enforcer 2.jpg|Enforcer 2 (Included in boxed set) | |
| − | + | file:Necromunda Enforcer 3.jpg|Enforcer 3 (Included in boxed set) | |
| − | + | file:Necromunda Enforcer 4.jpg|Enforcer 4 (Included in boxed set) | |
| − | + | file:Necromunda Enforcer Hound.jpg|Hound (Included in boxed set) | |
| − | + | file:Necromunda Enforcer Weapons Sprue 1.jpg|Weapons Sprue 1 (Included in boxed set) | |
| − | + | file:Necromunda Enforcer Weapons Sprue 2.jpg|Weapons Sprue 2 (Included in boxed set) | |
| − | + | file:Necromunda Enforcer Weapons Sprue 3.jpg|Weapons Sprue 3 (Included in boxed set) | |
| − | + | file:Necromunda Enforcer Weapons Sprue 4.jpg|Weapons Sprue 4 (Included in boxed set) | |
</gallery> | </gallery> | ||
| Line 222: | Line 222: | ||
<gallery> | <gallery> | ||
| − | + | file:Necromunda Arbites Champion.jpg|Champion | |
| − | + | file:Necromunda Arbites with grenade launcher.jpg|Arbites with grenade launcher | |
| − | + | file:Necromunda Arbites with power maul.jpg|Arbites with power maul | |
| − | + | file:Necromunda Arbites with shotgun 1.jpg|Arbites with shotgun 1 | |
| − | + | file:Necromunda Arbites with shotgun 2.jpg|Arbites with shotgun 2 | |
| − | + | file:Necromunda Arbites with bolter 1.jpg|Arbites with bolter 1 | |
| − | + | file:Necromunda Arbites with bolter 2.jpg|Arbites with bolter 2 | |
</gallery> | </gallery> | ||
| Line 236: | Line 236: | ||
<gallery> | <gallery> | ||
| − | + | file:Necromunda Chaos Cultist Demagogue 1.jpg|Demagogue 1 | |
| − | + | file:Necromunda Chaos Cultist Demagogue 2.jpg|Demagogue 2 | |
| − | + | file:Necromunda Chaos Cultist 1.jpg|Cultist 1 | |
| − | + | file:Necromunda Chaos Cultist 2.jpg|Cultist 2 | |
| − | + | file:Necromunda Chaos Cultist 3.jpg|Cultist 3 | |
| − | + | file:Necromunda Chaos Cultist 4.jpg|Cultist 4 | |
| − | + | file:Necromunda Chaos Cultist 5.jpg|Cultist 5 | |
| − | + | file:Necromunda Chaos Cultist 6.jpg|Cultist 6 | |
</gallery> | </gallery> | ||
[[Category:Necromunda]] | [[Category:Necromunda]] | ||
Revision as of 03:58, 1 June 2011
Where pictures of the actual figures were not available at the time of putting this page together, the pictures from the Games Workshop Specialist Games 2005 Catalogue were used, until such time as pictures of the actual figures could be found. No breach of Games Workshop copyright intended.
Contents
1999-2005 Hired Guns, Bounty Hunters and Characters

Kal Jericho
Scabbs
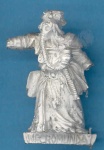
Ash Waste Shaman
Sniper
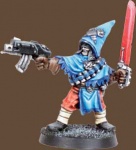
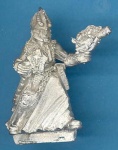
Farseer Yrthrian Mardawn
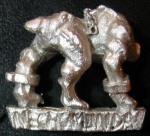
Fire Dragon Bodyguard 1
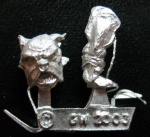
Fire Dragon Bodyguard 2
Bounty Hunter 1
Bounty Hunter 2
Bounty Hunter 3
Goliath Bounty Hunter
The Caller
Patriarch Spyrer
Matriarch Spyrer
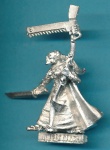
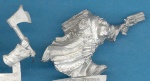
The Redeemer
Malakev
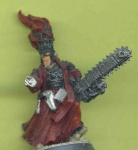
The Redeemer - Black Library Limited Edition
Malakev - Black Library Limited Edition
Cawdor Leader


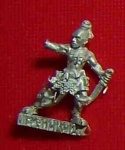
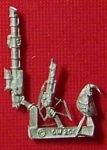
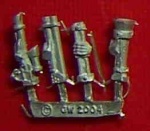
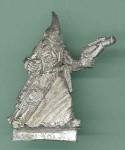
Eldar
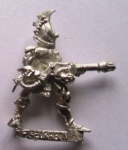
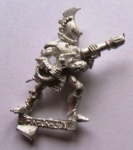
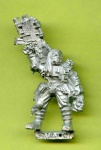
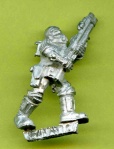
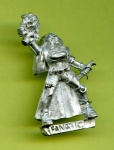
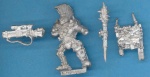
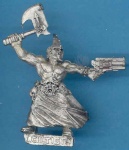
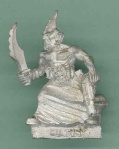
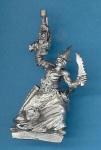
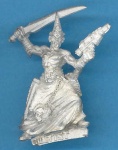
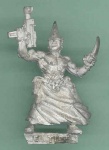
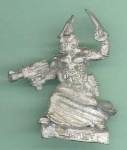
When Fanatic/Specialist Games still supported the peripheral games put out by GW, the releases often tended to be bizarre. The Necromunda special character of Yrthrian Mardawn, a rogue Farseer and his Fire Dragon bodyguard, did not seem to fit the idea of Eldar or the concept of Necromunda. The figures were discontinued in 2004 in the UK, but were still available in the US in 2007.
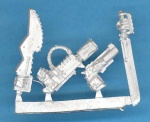
Farseer Yrthrian Mardawn
Fire Dragon Bodyguard 1
Fire Dragon Bodyguard 2
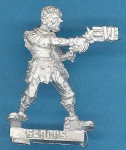
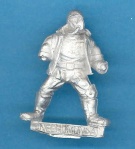
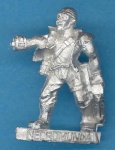
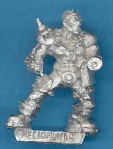
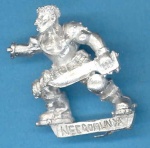
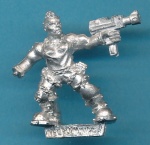
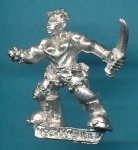
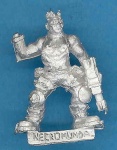
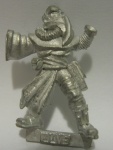
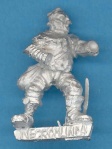
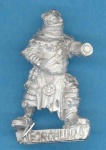
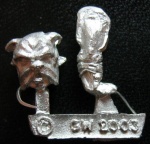
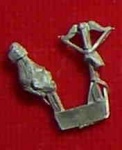
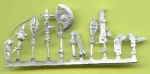
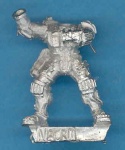
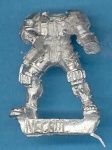
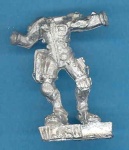
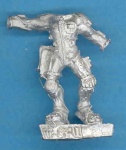
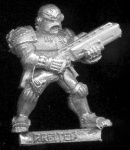
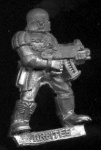
Orlocks
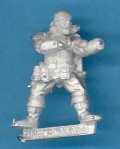
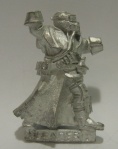
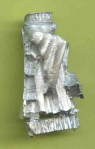
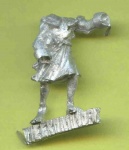
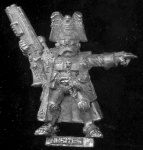
Champion 1 body (Included in boxed set)
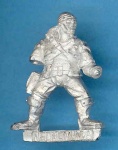
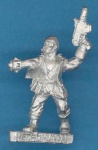
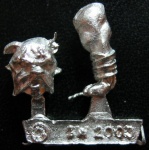
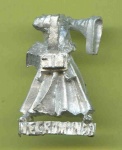
Champion 2 body
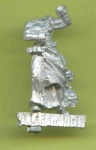
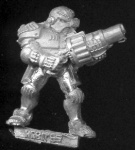
Heavy 1 body (Included in boxed set)
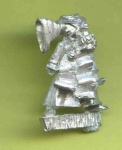
Heavy 2 body
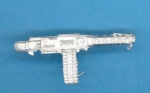
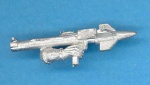
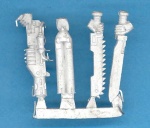
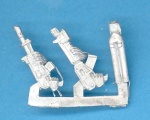
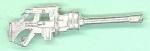
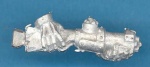
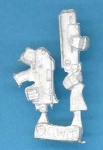
Heavy Stubber (Included in boxed set)
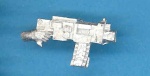
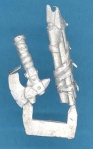
Heavy Bolter
Heavy Missile Launcher
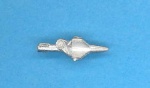
Missile
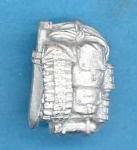
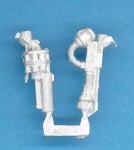
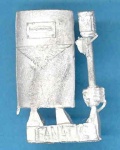
Heavy Backpack (Included in boxed set)
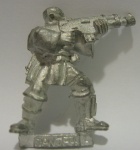
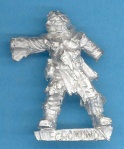
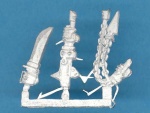
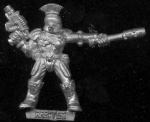
Ganger 1 (Included in boxed set)

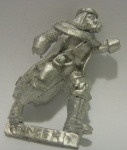
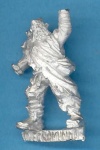
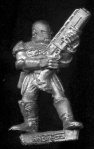
Ganger 2 (Included in boxed set)
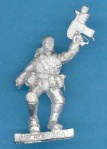
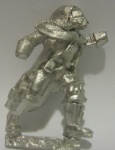
Ganger 3 (Included in boxed set)
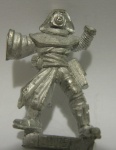
Ganger 4 (Included in boxed set)
Juve 1 (Included in boxed set)
Juve 2 (Included in boxed set)
Juve 3
Juve 4
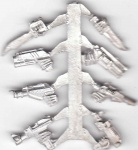
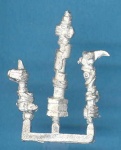
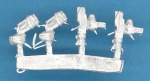
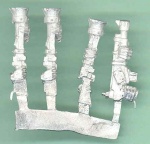
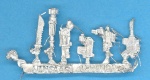
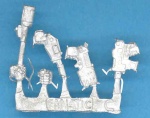
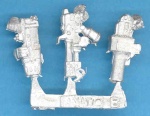
Weapon Sprue 1 (Included in boxed set)
Weapon Sprue 2 (Included in boxed set)
Weapon Sprue 3 (Included in boxed set)
Weapon Sprue 4 (Included in boxed set)

Weapon Sprue 5 (Included in boxed set)


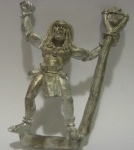
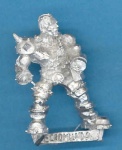
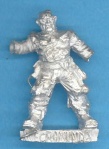
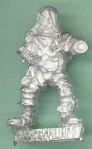
Goliaths
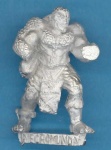
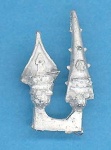
Champion 1 body (Included in boxed set)
Champion 2 body
Heavy 1 body
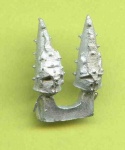
Heavy 2 body (Included in boxed set)
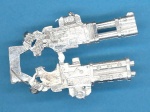
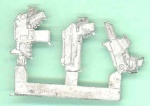
Heavy Weapon Sprue (Included in boxed set)

Heavy Backpack (Included in boxed set)
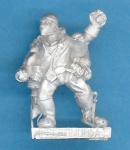
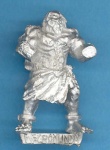
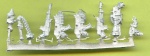
Goliath Ganger 1 (Included in boxed set)
Goliath Ganger 2 (Included in boxed set)
Goliath Ganger 3 (Included in boxed set)

Goliath Ganger 4 (Included in boxed set)
Goliath Ganger 5
Goliath Juve 1
Goliath Juve 2 (Included in boxed set)
Goliath Juve 3 (Included in boxed set)
Goliath Juve 4
Goliath Juve 5
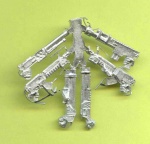
Weapon Sprue 1 (Included in boxed set)
Weapon Sprue 2 (Included in boxed set)
Weapon Sprue 3 (Included in boxed set)
Weapon Sprue 4 (Included in boxed set)


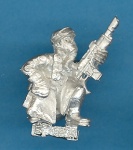
Ash Waste
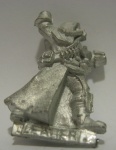
Leader with goggles
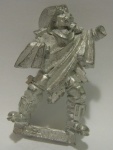
Leader with hood

Heavy with hood down
Heavy with hood up
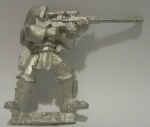
Ganger with sniper rifle
Ganger with autogun
Ganger with cap
Ganger with hood
Juve with hood up

Juve with hood down
Juve with scarf
Hand Weapon Sprue
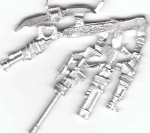
Rifle Sprue

Stubber
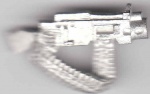
Heavy Bolter
Sniper Rifle


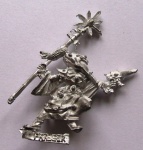
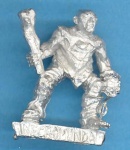
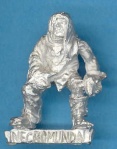
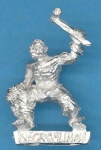
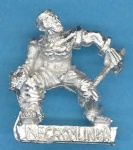
Scavvies
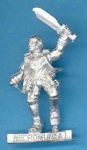
Leader 1 (Included in boxed set)

Leader 2
Scaly Body 1 (Included in boxed set)
Scaly Body 2

Harpoon Gun 1
Harpoon Gun 2 (Included in boxed set)
Scaly Sprue
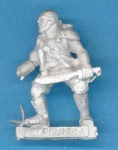
Ganger 1 (Included in boxed set)
Ganger 2 (Included in boxed set)
Ganger 3 (Included in boxed set)
Ganger 4 (Included in boxed set)
Ganger 5 (Included in boxed set)
Ganger 6 (Included in boxed set)
Weapon Sprue 1 (Included in boxed set)
Weapon Sprue 2 (Included in boxed set)
Weapon Sprue 3 (Included in boxed set)
Weapon Sprue 4 (Included in boxed set)
Ghoul 1
Ghoul 2
Ghoul 3
Ghoul 4
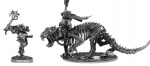
Dog
Dog Head Sprue 1
Dog Head Sprue 2
Dog Head Sprue 3


Ratskins

Chief 1
Chief 2
Chief 3
Warrior 1 (included in booster pack)
Warrior 2 (included in booster pack)
Warrior 3
Warrior 4

Warrior 5
Warrior 6

Brave 1 (included in booster pack)
Brave 2
Brave 3
Weapon Sprue 1

Weapon Sprue 2 (included in booster pack)
Weapon Sprue 3 (included in booster pack)
Weapon Sprue 4 (included in booster pack)
Weapon Sprue 5
Weapon Sprue 6


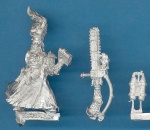
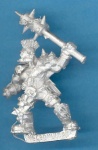
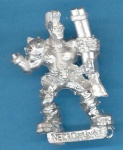
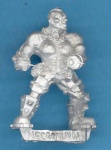
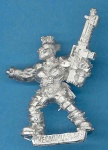
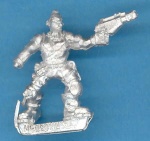
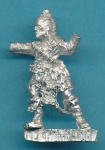
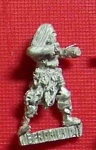
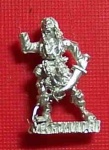
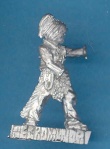
Redemptionists
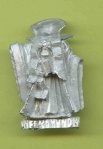
Leader Priest 1 (Included in boxed set)
Leader Priest 2 (Included in boxed set)
Brother 1 (Included in boxed set)
Brother 2 (Included in boxed set)
Brother 3 (Included in boxed set)
Brother 4 (Included in boxed set)
Juve 1 (Included in boxed set)

Juve 2 (Included in boxed set)
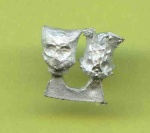
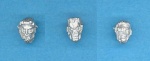
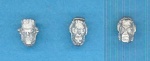
Head Sprue 1 (Included in boxed set)
Head Sprue 2 (Included in boxed set)
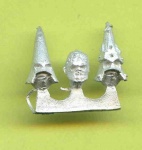
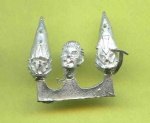
Head Sprue 3 (Included in boxed set)
Head Sprue 4 (Included in boxed set)
Head Sprue 5 (Included in boxed set)
Weapon Sprue 1 (Included in boxed set)
Weapon Sprue 2 (Included in boxed set)
Weapon Sprue 3 (Included in boxed set)


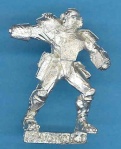
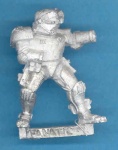
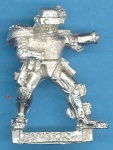
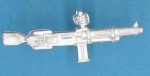
Van Saar
Body 1
Body 2
Body 3
Body 4
Head Sprue 1
Head Sprue 2
Weapon Sprue 1
Weapon Sprue 2
Weapon Sprue 3


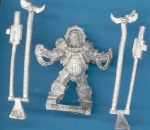
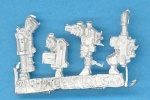
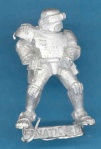
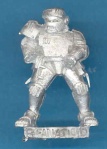
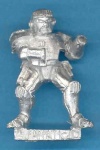
Enforcers
Champion 1
Champion 2 (Included in boxed set)
Champion 3
Heavy 1 (Included in boxed set)
Heavy 2
Heavy Weapon (Included in boxed set)
Enforcer 1 (Included in boxed set)

Enforcer 2 (Included in boxed set)
Enforcer 3 (Included in boxed set)
Enforcer 4 (Included in boxed set)
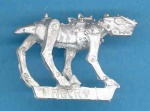
Hound (Included in boxed set)
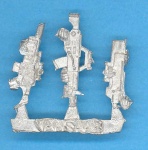
Weapons Sprue 1 (Included in boxed set)
Weapons Sprue 2 (Included in boxed set)
Weapons Sprue 3 (Included in boxed set)
Weapons Sprue 4 (Included in boxed set)


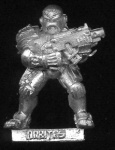
Arbites
These figures were originally released in the early 1990’s as Forces of the Imperium. Three figures appeared in the 1991 Blue Catalogue (power maul, bolter 1 and shotgun 1) with the other four figures appearing in the 1993 Black Catalogue. They then seemed to disappear from the catalogues (although they were available from mail order) until 2004 when they appeared as part of the Necromunda listings.
Champion
Arbites with grenade launcher
Arbites with power maul
Arbites with shotgun 1
Arbites with shotgun 2
Arbites with bolter 1
Arbites with bolter 2


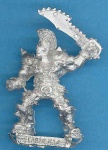
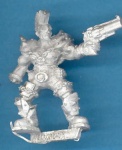
Chaos Cultists
These figures appeared in the 40K Chaos Marine listings in the 1999 Citadel Miniatures Annual. They later appeared in Gang War as a Necromunda gang.
Demagogue 1
Demagogue 2
Cultist 1
Cultist 2
Cultist 3
Cultist 4
Cultist 5
Cultist 6


