Difference between revisions of "Tyranids (Second Edition) - Collectors Guide"
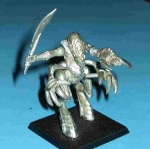
(New page: == Termagants == <gallery> Image:LE 1 Space Ork.jpg|LE 1 Space Ork </gallery> == Squigs == == Gargoyles == == Hormagants == == Ripper Swarms == == Warriors == == Hive Tyrant, Biovor...) |
|||
| Line 2: | Line 2: | ||
<gallery> | <gallery> | ||
| − | Image: | + | Image:Termagant with fleshborer 1.jpg|Termagant with fleshborer 1 |
| + | Image:Termagant with fleshborer 2.jpg|Termagant with fleshborer 2 | ||
| + | Image:Termagant with fleshborer 3.jpg|Termagant with fleshborer 3 | ||
| + | Image:Termagant with fleshborer 4.jpg|Termagant with fleshborer 4 | ||
| + | Image:Termagant with spike rifle 1.jpg|Termagant with spike rifle 1 | ||
| + | Image:Termagant with spike rifle 2.jpg|Termagant with spike rifle 2 | ||
| + | Image:Termagant with spike rifle 3.jpg|Termagant with spike rifle 3 | ||
| + | Image:Termagant with spike rifle 4.jpg|Termagant with spike rifle 4 | ||
| + | Image:Termagant with strangleweb 1.jpg|Termagant with strangleweb 1 | ||
| + | Image:Termagant with strangleweb 2.jpg|Termagant with strangleweb 2 | ||
| + | Image:Termagant with strangleweb 3.jpg|Termagant with strangleweb 3 | ||
| + | Image:Termagant with strangleweb 4.jpg|Termagant with strangleweb 4 | ||
</gallery> | </gallery> | ||
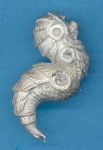
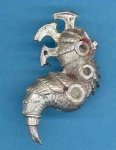
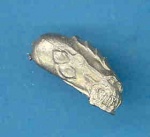
== Squigs == | == Squigs == | ||
| + | |||
| + | <gallery> | ||
| + | Image:Big Squig 1.jpg|Big Squig 1 | ||
| + | Image:Big Squig 2.jpg|Big Squig 2 | ||
| + | Image:Squig 3.jpg|Squig 3 | ||
| + | Image:Squig 4.jpg|Squig 4 | ||
| + | Image:Squig 5.jpg|Squig 5 | ||
| + | Image:Squig 6.jpg|Squig 6 | ||
| + | Image:Squig 7.jpg|Squig 7 | ||
| + | Image:Squig 8.jpg|Squig 8 | ||
| + | Image:Squig 9.jpg|Squig 9 | ||
| + | Image:Squig 10.jpg|Squig 10 | ||
| + | Image:Squig 11.jpg|Squig 11 | ||
| + | Image:Squig 12.jpg|Squig 12 | ||
| + | </gallery> | ||
== Gargoyles == | == Gargoyles == | ||
| + | |||
| + | <gallery> | ||
| + | Image:Gargoyle 1.jpg|Gargoyle 1 | ||
| + | Image:Gargoyle 2.jpg|Gargoyle 2 | ||
| + | Image:Gargoyle 3.jpg|Gargoyle 3 | ||
| + | Image:Gargoyle 4.jpg|Gargoyle 4 | ||
| + | </gallery> | ||
== Hormagants == | == Hormagants == | ||
| + | |||
| + | <gallery> | ||
| + | Image:Hormagant 1.jpg|Hormagant 1 | ||
| + | Image:Hormagant 2.jpg|Hormagant 2 | ||
| + | Image:Hormagant 3.jpg|Hormagant 3 | ||
| + | </gallery> | ||
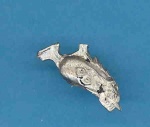
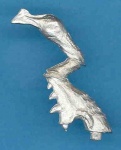
== Ripper Swarms == | == Ripper Swarms == | ||
| + | |||
| + | <gallery> | ||
| + | Image:Ripper Body 1.jpg|Ripper Body 1 | ||
| + | Image:Ripper Body 2.jpg|Ripper Body 2 | ||
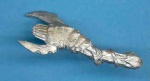
| + | Image:Ripper Twin Body.jpg|Ripper Twin Body | ||
| + | Image:Ripper Head 1.jpg|Ripper Head 1 | ||
| + | Image:Ripper Head 2.jpg|Ripper Head 2 | ||
| + | </gallery> | ||
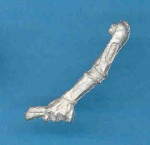
== Warriors == | == Warriors == | ||
| + | |||
| + | <gallery> | ||
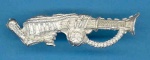
| + | Image:Warrior with venom cannon.jpg|Warrior with venom cannon | ||
| + | Image:Warrior with barbed strangler.jpg|Warrior with barbed strangler | ||
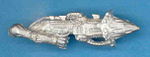
| + | Image:Warrior with devourer.jpg|Warrior with devourer | ||
| + | Image:Warrior with spinefist & bonesword.jpg|Warrior with spinefist & bonesword | ||
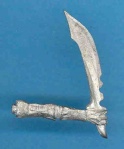
| + | Image:Warrior with lashwhip & bonesword.jpg|Warrior with lashwhip & bonesword | ||
| + | </gallery> | ||
| + | |||
| + | <gallery> | ||
| + | Image:Warrior body 1.jpg|Warrior body 1 | ||
| + | Image:Warrior body 2.jpg|Warrior body 2 | ||
| + | Image:Warrior head 1.jpg|Warrior head 1 | ||
| + | Image:Warrior head 2.jpg|Warrior head 2 | ||
| + | Image:Warrior left leg.jpg|Warrior left leg | ||
| + | Image:Warrior right leg.jpg|Warrior right leg | ||
| + | Image:Warrior cannon arm.jpg|Warrior cannon arm | ||
| + | Image:Warrior venom cannon arm.jpg|Warrior venom cannon arm | ||
| + | Image:Warrior barbed strangler arm.jpg|Warrior barbed strangler arm | ||
| + | Image:Warrior devourer arm.jpg|Warrior devourer arm | ||
| + | Image:Warrior spinefist arm.jpg|Warrior spinefist arm | ||
| + | Image:Warrior whip arm & lash whip.jpg|Warrior whip arm & lash whip | ||
| + | Image:Warrior right arm with bonesword 1.jpg|Warrior right arm with bonesword 1 | ||
| + | Image:Warrior right arm with bonesword 2.jpg|Warrior right arm with bonesword 2 | ||
| + | Image:Warrior left arm with bonesword 1.jpg|Warrior left arm with bonesword | ||
| + | </gallery> | ||
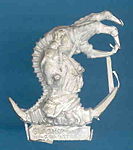
== Hive Tyrant, Biovore, Zoanthrope, Lictor, Carnifex == | == Hive Tyrant, Biovore, Zoanthrope, Lictor, Carnifex == | ||
Revision as of 02:23, 9 September 2008
Contents
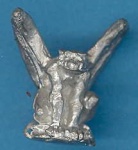
Termagants
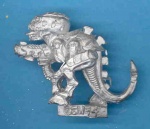
Termagant with fleshborer 1
Termagant with fleshborer 2

Termagant with fleshborer 3

Termagant with fleshborer 4
Termagant with spike rifle 1

Termagant with spike rifle 2
Termagant with spike rifle 3

Termagant with spike rifle 4
Termagant with strangleweb 1
Termagant with strangleweb 2

Termagant with strangleweb 3
Termagant with strangleweb 4


Squigs
Big Squig 1
Big Squig 2
Squig 3
Squig 4
Squig 5
Squig 6
Squig 7
Squig 8
Squig 9
Squig 10
Squig 11
Squig 12


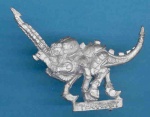
Gargoyles
Gargoyle 1
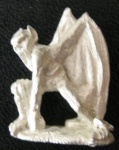
Gargoyle 2
Gargoyle 3
Gargoyle 4


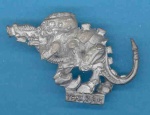
Hormagants
Hormagant 1
Hormagant 2
Hormagant 3
Ripper Swarms

Ripper Body 1
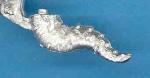
Ripper Body 2
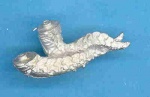
Ripper Twin Body

Ripper Head 1

Ripper Head 2


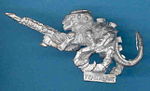
Warriors

Warrior with venom cannon

Warrior with barbed strangler

Warrior with devourer
Warrior with spinefist & bonesword

Warrior with lashwhip & bonesword


Warrior body 1
Warrior body 2
Warrior head 1
Warrior head 2

Warrior left leg
Warrior right leg
Warrior cannon arm
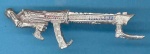
Warrior venom cannon arm
Warrior barbed strangler arm
Warrior devourer arm
Warrior spinefist arm
Warrior whip arm & lash whip
Warrior right arm with bonesword 1

Warrior right arm with bonesword 2

Warrior left arm with bonesword


