Difference between revisions of "Doctor Who"
(→DW9 Time Lords) |
Illuminatus (talk | contribs) m (→Plastic Dalek & Cybermen Box Set) |
||
| (7 intermediate revisions by 3 users not shown) | |||
| Line 2: | Line 2: | ||
<gallery> | <gallery> | ||
| − | + | file:DW1 The First Doctor.jpg|DW1 The First Doctor | |
| − | + | file:DW1 The Second Doctor.jpg|DW1 The Second Doctor | |
| − | + | file:DW1 The Third Doctor.jpg|DW1 The Third Doctor | |
</gallery> | </gallery> | ||
| Line 10: | Line 10: | ||
<gallery> | <gallery> | ||
| − | + | file:DW2 The Fourth Doctor.jpg|DW2 The Fourth Doctor | |
| − | + | file:DW2 The Fith Doctor.jpg|DW2 The Fith Doctor | |
| − | + | file:DW2 The Master.jpg|DW2 The Master | |
</gallery> | </gallery> | ||
| Line 18: | Line 18: | ||
<gallery> | <gallery> | ||
| − | + | file:DW3 Daleks.jpg|DW3 Daleks (Two per blister) | |
</gallery> | </gallery> | ||
| Line 24: | Line 24: | ||
<gallery> | <gallery> | ||
| − | + | file:DW4 Cyberman 1.jpg|DW4 Cyberman 1 | |
| − | + | file:DW4 Cyberman 2.jpg|DW4 Cyberman 2 | |
| − | + | file:DW4 Cyberman 3.jpg|DW4 Cyberman 3 | |
</gallery> | </gallery> | ||
| Line 32: | Line 32: | ||
<gallery> | <gallery> | ||
| − | + | file:DW5 Ice Warrior 1.jpg|DW5 Ice Warrior 1 | |
| − | + | file:DW5 Ice Warrior 2.jpg|DW5 Ice Warrior 2 | |
| − | + | file:DW5 Ice Warrior 3.jpg|DW5 Ice Warrior 3 | |
</gallery> | </gallery> | ||
| Line 40: | Line 40: | ||
<gallery> | <gallery> | ||
| − | + | file:DW6 Sergeant Benson.jpg|DW6 Sergeant Benson | |
| − | + | file:DW6 Capt. Yates.jpg|DW6 Capt. Yates | |
| − | + | file:DW6 Brigadier Leithbridge-Stewart.jpg|DW6 Brigadier Leithbridge-Stewart | |
</gallery> | </gallery> | ||
| + | |||
| + | The UNIT troopers were produced with a number of head variants. It seems that, after the original two figures (one firing, one advancing) were produced, a number of the castings were re sculpted with a new head in green stuff. These were then cast to create the variants. | ||
| + | |||
| + | The variants can be difficult to distinguish and it generally requires a close look at both the front and the side views to tell them apart. | ||
<gallery> | <gallery> | ||
| − | + | ||
| − | + | file:DW6 UNIT Trooper Advancing Variant 1 green.jpg|DW6 UNIT Trooper Advancing Variant 1 | |
| − | + | file:DW6 UNIT Trooper Advancing Variant 2 green.jpg|DW6 UNIT Trooper Advancing Variant 2 | |
| − | + | file:DW6 UNIT Trooper Advancing Variant 3 front.jpg|DW6 UNIT Trooper Advancing Variant 3 | |
| − | + | file:DW6 UNIT Trooper Advancing Variant 4 front.jpg|DW6 UNIT Trooper Advancing Variant 4 | |
| − | + | file:DW6 UNIT Trooper Advancing Variant 5 front.jpg|DW6 UNIT Trooper Advancing Variant 5 | |
| − | + | file:DW6 UNIT Trooper Advancing Variant 6 front.jpg|DW6 UNIT Trooper Advancing Variant 6 | |
| − | + | file:DW6 UNIT Trooper Firing Variant 1 green.jpg|DW6 UNIT Trooper Firing Variant 1 | |
| − | + | file:DW6 UNIT Trooper Firing Variant 2 green.jpg|DW6 UNIT Trooper Firing Variant 2 | |
| − | + | file:DW6 UNIT Trooper Firing Variant 3 green.jpg|DW6 UNIT Trooper Firing Variant 3 | |
| − | + | file:DW6 UNIT Trooper Firing Variant 4 front.jpg|DW6 UNIT Trooper Firing Variant 4 | |
| − | + | file:DW6 UNIT Trooper Firing Variant 5 front.jpg|DW6 UNIT Trooper Firing Variant 5 | |
| + | file:DW6 UNIT Trooper Firing Variant 6 side.jpg|DW6 UNIT Trooper Firing Variant 6 | ||
</gallery> | </gallery> | ||
| Line 63: | Line 68: | ||
<gallery> | <gallery> | ||
| − | + | file:DW7 Adric.jpg|DW7 Adric | |
| − | + | file:DW7 Leela.jpg|DW7 Leela | |
| − | + | file:DW7 Sarah Jane.jpg|DW7 Sarah Jane | |
</gallery> | </gallery> | ||
| Line 71: | Line 76: | ||
<gallery> | <gallery> | ||
| − | + | file:DW8 Davros.jpg|DW8 Davros | |
| − | + | file:DW8 Engineer Dalek.jpg|DW8 Engineer Dalek | |
| − | + | file:DW8 K9.jpg|DW8 K9 | |
</gallery> | </gallery> | ||
| Line 79: | Line 84: | ||
<gallery> | <gallery> | ||
| − | + | file:DW9 Time Lord 1.jpg|DW9 Time Lord 1 | |
| − | + | file:DW9 Time Lord 2.jpg|DW9 Time Lord 2 | |
| − | + | file:DW9 Time Lord 3.jpg|DW9 Time Lord 3 | |
| − | + | file:DW9 Time Lord 4.jpg|DW9 Time Lord 4 | |
| − | + | file:DW9 Time Lord 5.jpg|DW9 Time Lord 5 | |
| − | + | file:DW9 Time Lord 6.jpg|DW9 Time Lord 6 | |
| − | + | file:DW9 Time Lord 7.jpg|DW9 Time Lord 7 | |
| − | + | file:DW9 Time Lord 8.jpg|DW9 Time Lord 8 | |
| − | + | file:DW9 Time Lord 9.jpg|DW9 Time Lord 9 | |
| − | + | file:DW9 Time Lord 10.jpg|DW9 Time Lord 10 | |
| − | + | file:DW9 Time Lord 11.jpg|DW9 Time Lord 11 | |
| + | |||
</gallery> | </gallery> | ||
| Line 96: | Line 102: | ||
<gallery> | <gallery> | ||
| − | + | file:DW10 Sea Devil 1.jpg|DW10 Sea Devil 1 | |
| − | + | file:DW10 Sea Devil 2.jpg|DW10 Sea Devil 2 | |
| − | + | file:DW10 Sea Devil 3.jpg|DW10 Sea Devil 3 | |
</gallery> | </gallery> | ||
| Line 104: | Line 110: | ||
<gallery> | <gallery> | ||
| − | + | file:DW11 Jo Grant.jpg|DW11 Jo Grant | |
| − | + | file:DW11 Romana.jpg|DW11 Romana | |
| − | + | file:DW11 Turlough.jpg|DW11 Turlough | |
</gallery> | </gallery> | ||
| + | |||
| + | == Plastic Dalek & Cybermen Box Set == | ||
| + | |||
| + | <gallery> | ||
| + | file:Box Set Top.jpg|<center>Box Set Top | ||
| + | file:Box Set Bottom.jpg|<center>Box Set Underside | ||
| + | file:Box Set Sprue.jpg|<center>Box Set Sprue | ||
| + | </gallery> | ||
| + | |||
[[Category:Research]] | [[Category:Research]] | ||
| + | [[Category:Licensed]] | ||
| + | [[Category:Doctor Who]] | ||
Latest revision as of 02:23, 22 March 2014
Contents
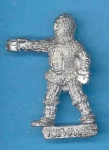
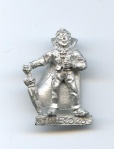
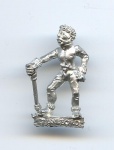
DW1 The First Doctors
DW1 The First Doctor

DW1 The Second Doctor

DW1 The Third Doctor


DW2 The Later Doctors
DW2 The Fourth Doctor
DW2 The Fith Doctor
DW2 The Master

DW3 Daleks
DW3 Daleks (Two per blister)
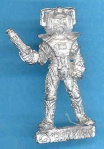
DW4 Cybermen

DW4 Cyberman 1

DW4 Cyberman 2
DW4 Cyberman 3


DW5 Ice Warriors
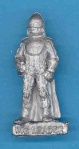
DW5 Ice Warrior 1

DW5 Ice Warrior 2
DW5 Ice Warrior 3


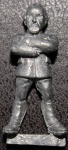
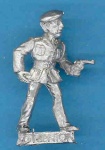
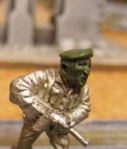
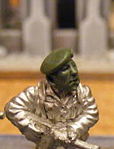
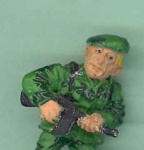
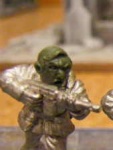
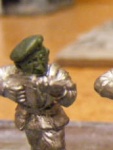
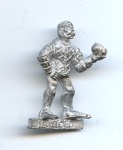
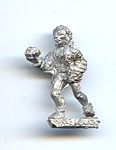
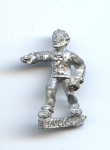
DW6 U.N.I.T. Troops
DW6 Sergeant Benson
DW6 Capt. Yates
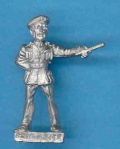
DW6 Brigadier Leithbridge-Stewart


The UNIT troopers were produced with a number of head variants. It seems that, after the original two figures (one firing, one advancing) were produced, a number of the castings were re sculpted with a new head in green stuff. These were then cast to create the variants.
The variants can be difficult to distinguish and it generally requires a close look at both the front and the side views to tell them apart.
DW6 UNIT Trooper Advancing Variant 1
DW6 UNIT Trooper Advancing Variant 2

DW6 UNIT Trooper Advancing Variant 3

DW6 UNIT Trooper Advancing Variant 4

DW6 UNIT Trooper Advancing Variant 5
DW6 UNIT Trooper Advancing Variant 6
DW6 UNIT Trooper Firing Variant 1
DW6 UNIT Trooper Firing Variant 2
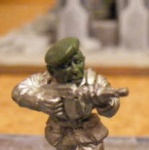
DW6 UNIT Trooper Firing Variant 3
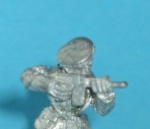
DW6 UNIT Trooper Firing Variant 4

DW6 UNIT Trooper Firing Variant 5

DW6 UNIT Trooper Firing Variant 6


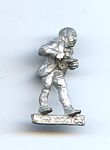
DW7 Adric, Leila, Sarah Jane

DW7 Adric
DW7 Leela
DW7 Sarah Jane


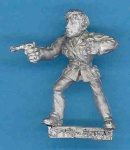
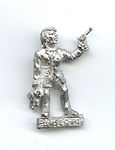
DW8 Davros, Engineer Dalek, K9
DW8 Davros
DW8 Engineer Dalek
DW8 K9
DW9 Time Lords

DW9 Time Lord 1

DW9 Time Lord 2
DW9 Time Lord 3

DW9 Time Lord 4
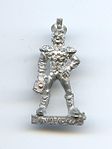
DW9 Time Lord 5
DW9 Time Lord 6
DW9 Time Lord 7
DW9 Time Lord 8
DW9 Time Lord 9
DW9 Time Lord 10

DW9 Time Lord 11


DW10 Sea Devils

DW10 Sea Devil 1

DW10 Sea Devil 2
DW10 Sea Devil 3


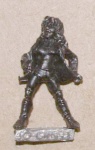
DW11 Jo Grant, Romana, Turlough
DW11 Jo Grant
DW11 Romana
DW11 Turlough

Plastic Dalek & Cybermen Box Set

Box Set Top 
Box Set Underside 
Box Set Sprue


